Istick Reads Protection and Does Not Work
You've finished piece of work for the day. The simply thing left to do is stick the files onto a USB flash drive. And so you get this message: "The disk is write protected. Remove the write protection or use another disk." You immediately pull your hair out. This is your USB stick; you should be able to read, write, and practise whatever you want with information technology!
Okay, you lot didn't pull your hair out. You stayed dainty and calm. But you definitely need to get your USB bulldoze fixed. Luckily, there are a few simple steps to prepare write protection on a USB drive. Information technology's just engineering. You can ready information technology.
1. Check the USB Stick for Viruses
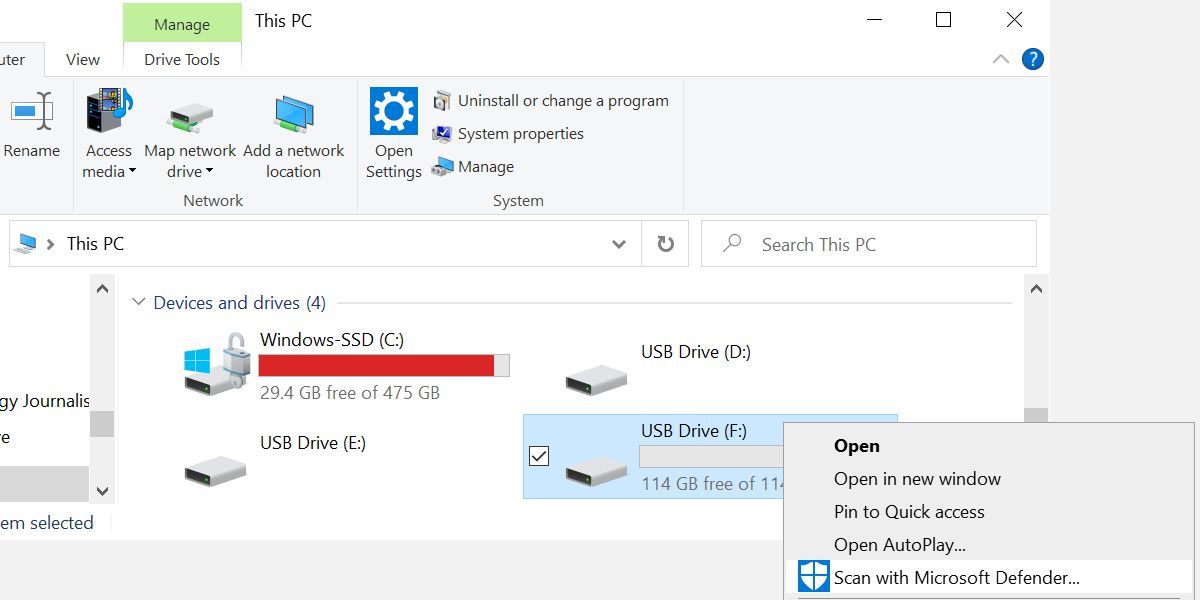
Every time you plug a USB drive into your computer, you lot should automatically scan information technology for viruses, especially if you have used it on a computer y'all don't own or a public computer.
Viruses often act in a manner that will fill your USB drive with nonsense files, and this can make your USB drive respond with the Write Protected mistake.
Depending on your antivirus software, y'all may exist able to configure it to browse a USB drive when first plugged in automatically. If non, you lot tin can navigate to the USB drive in Windows Explorer, right-click, and forcefulness a transmission antivirus scan.
If yous do find a virus, eliminate it using your antivirus software. At this bespeak, I would advise performing a full system browse after updating your virus definitions. If there is one virus lurking on your USB drive, you never know what might be propagating on your principal system.
ii. Check the USB Drive Body
Normally I'd make something this elementary the first step. Nonetheless, I'd rather see you protected from a virus instead of starting with the simpler fixes. Some USB sticks have a mechanical switch on them that puts them into Write Protect style. This tin can exist a very small slider switch that may have caught on something in your pocket or computer case.
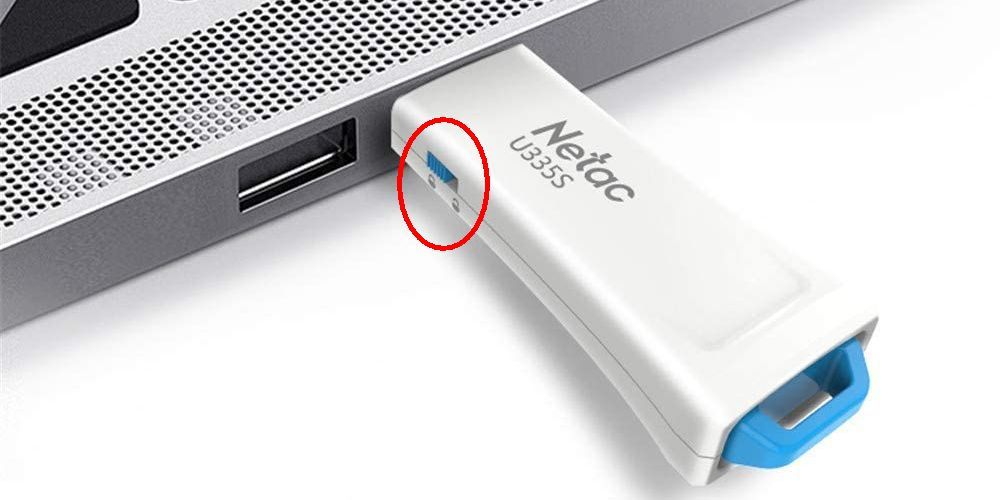
If this is the state of affairs, merely move the switch to the unlocked position and copy files again.
Luckily, there aren't a lot of newly manufactured USB sticks with these locks on them anymore.
3. Check to Make Certain the USB Stick Isn't Total
Yous may see the Write Protected error message if your USB stick is full.
Open up Windows Explorer, and browse to My PC. This gives you an overview of all drives connected to your system. Right-click your USB drive and select Properties. You'll be presented with a delightful donut-chart (what was incorrect with the venerable pie-chart, Microsoft?) displaying your current drive capacity.
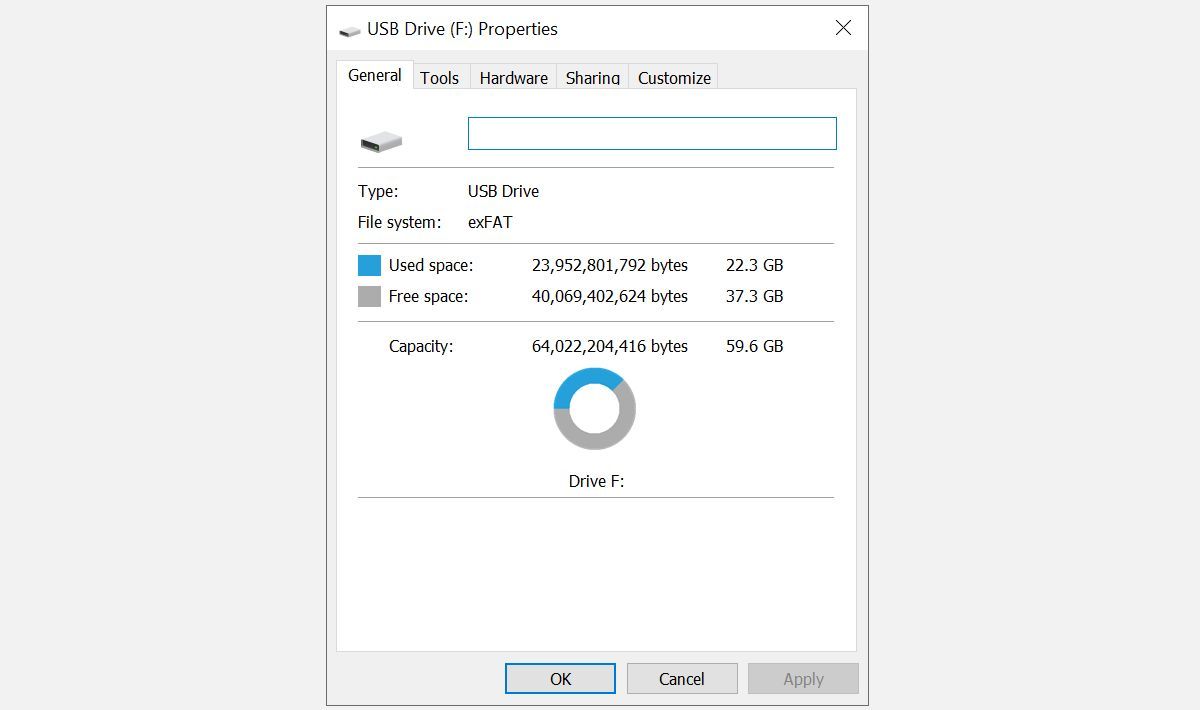
As you lot can see, I've got room to spare. Simply if your USB drive is completely total, information technology can render a Write Protection error message.
iv. Remove Individual Files With Write Protection
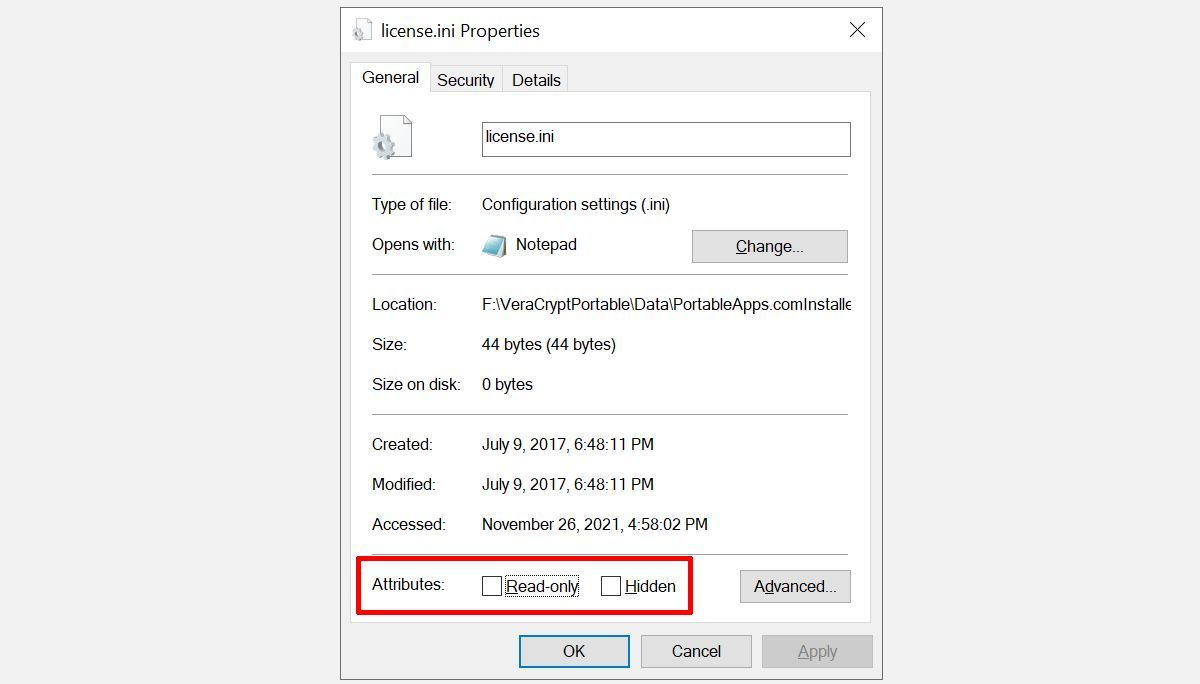
Sometimes a unmarried file can upset the rest. Mayhap i file is marked "read-merely," and refuses to be deleted from the drive. This causes an entirely different mistake bulletin, but information technology can exist off-putting, nonetheless.
Browse to your USB drive, and locate the offending file. Correct-click, and select Properties. At the bottom of the console, nether Attributes, ensure Read-merely is unchecked.
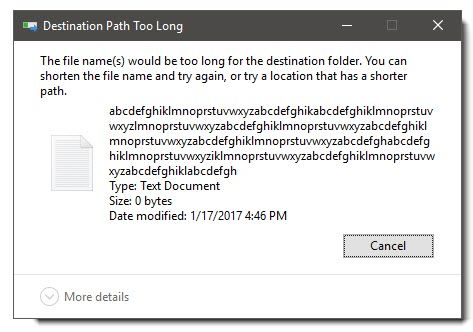
Sometimes single filenames become corrupted. In addition, long filenames are an inherited Windows feature ingrained in the MS-DOS architecture. The long and brusque of it is that if a filename exceeds 255 characters, you lot're going to take a bad time.
Saikat Basu has explained exactly how to delete files with long filenames. Check it out, relieve yourself some bother, and fix your USB flash drive.
5. DiskPart Command Prompt Utility
Are you familiar with the Command Prompt? Well, y'all're about to familiarize yourself a little more. Don't worry, information technology really isn't scary, and is the next logical step in our try to prepare your USB stick.
Hit Windows key + X, and select Control Prompt (Admin) from the menu. Type diskpart, and press Enter (1. in the beneath image). Next, type list deejay, and press Enter. You should run across a list of currently mounted disks, similar so (2. in the below image):
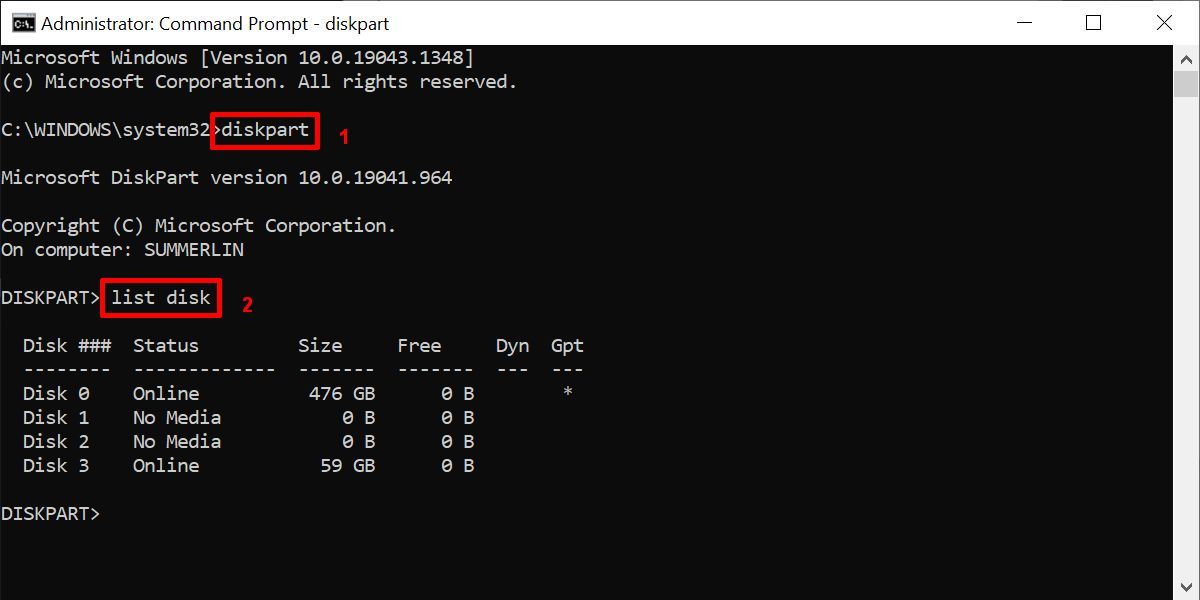
Brand sure you can see your USB drive. Mine is Disk iv. Make a note of your disk number. Now enter the post-obit control:
select disk [your disk number] Once selected, enter the following control:
attributes disk articulate readonly You've cleared any remaining read-only file attributes from the USB drive.

6. Clear Write Protection Fault in Windows Registry
If none of the previous steps take solved your Write Protection error, don't worry. Nosotros've nevertheless got a few more tricks in the book. Next, we're going to edit the Windows Registry. If you lot're not comfortable editing the registry, I empathise. You can skip to the adjacent section—how to format your write protected USB bulldoze. If that step is a little too drastic, I'd advise giving this option a try.
Press Windows Primal + R to open the Run dialogue. Type regedit and press Enter. Now, navigate to the following registry location:
HKEY_LOCAL_MACHINE\SYSTEM\CurrentControlSet\Control\StorageDevicePolicies Await for a cardinal named WriteProtect.
If it exists, double-click information technology. This volition open the Edit DWORD (32-bit) Value box. You can now set one of two values: 0 or 1. i means "Yes, write protect my USB storage devices." Conversely, 0 means "No, don't write protect my USB storage devices." Prepare the value to 0, and then press OK.
But At that place'south Nothing There?
In some cases, there is no WriteProtection registry entry. In this example, we tin can create a registry primal of our ain. Cheque out the short video I've made below:
(Something gone wrong? Reset the Windows registry to default.)
7. Format the USB Drive
Warning: Make sure that you dorsum up all the files and information from your USB bulldoze to your computer. All information will exist lost once yous format the USB drive.
Formatting the USB stick is a last resort. Nonetheless, it should make your USB drive able to be read and written to. Prior to formatting the USB drive, determine what kind of file system it already has—NTFS or FAT32. Normally the existing file system is the file system that is best suited for the drive.
Open Windows Explorer, and browse to My PC. This gives yous an overview of all drives connected to your organization. Right-click your USB drive and select Properties.
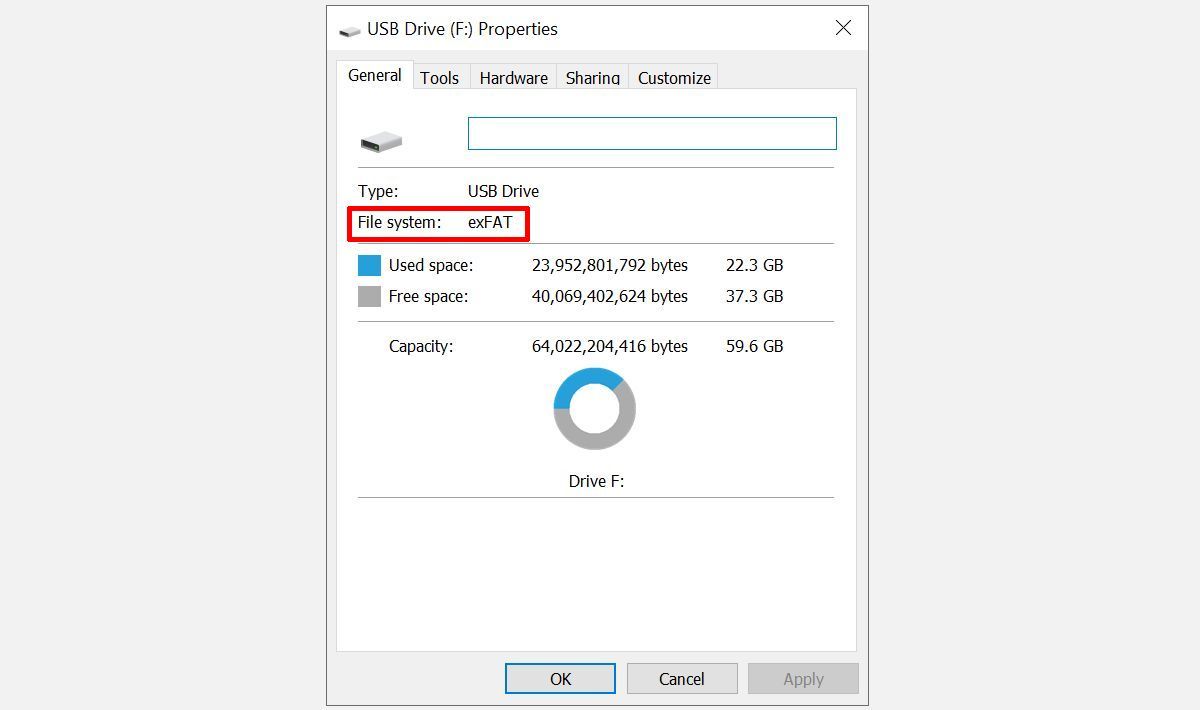
Shut the Properties window. Now, right-click the USB drive again, this time selecting Format. The Format window contains several customizable options, such as the aforementioned File system, the Allotment unit size, the Book Label, and the Quick Format option.
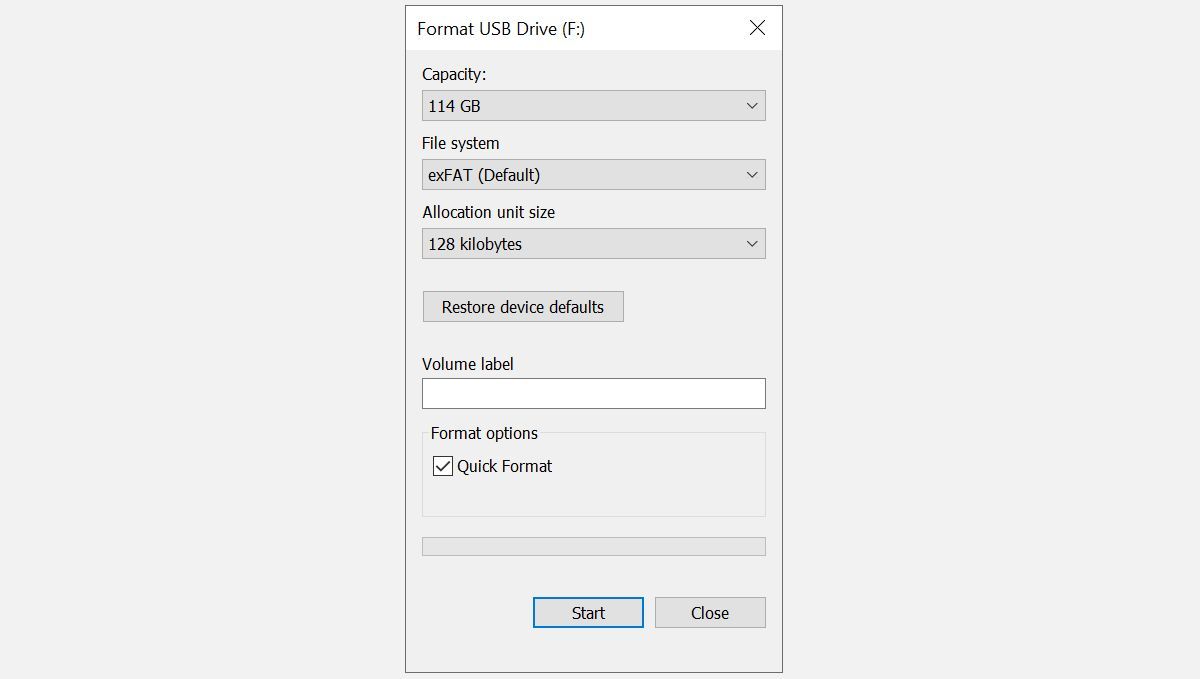
Change the Volume label to something memorable. Equally we are dealing with a potential hardware issue, uncheck the Quick Format box. That will force the format to practice more than just erase files. For case, if there is a bad sector on this USB drive, the "total" format will render an error.
Formatting won't take long, just the larger the drive, the longer you lot'll have to wait. Assuming in that location is no concrete problem with the drive, your USB bulldoze will be formatted, cleaned and set up to get.
8. Turn Off BitLocker
If you've been using BitLocker, make certain it's turned off before trying to make changes to files on locked partitions or drives.
Open up File Explorer, right-click your BitLocker partitioning or bulldoze and select Manage BitLocker. In the BitLocker Drive Encryption window, pick the affected drive, and click Plough off BitLocker. BitLocker volition showtime decryption. When information technology'south washed, y'all tin can edit and save files without the fault message popping upwardly over again.
9. But I've Got an SD Card
Luckily, the majority of the USB bulldoze Write Protection error fixes listed work with SD cards, too.
Unlike regular USB drives, SD cards nonetheless tend to come with a physical write protection switch. Ensure this is toggled before you panic.
USB Write Protection Errors, Solved
Sometimes, the trouble is elementary. Sometimes, the problem is difficult. Hopefully, we've found you a solution, in either case. However, if your USB drive issues persist, it could be that something more significant is afoot. In those cases, such as a deleted Division Tabular array, third-party software like TestDisk tin can save the day.
Regardless, you've got a lot more troubleshooting tools in your arsenal now and should exist able to become your USB drives working once again, potentially saving you a tidy sum of money and the pain of losing all of your files!
We promise you similar the items we recommend and discuss! MUO has affiliate and sponsored partnerships, so we receive a share of the revenue from some of your purchases. This won't affect the cost you pay and helps us offer the all-time product recommendations.
Nigh The Writer 
Source: https://www.makeuseof.com/tag/how-to-fix-write-protection-errors-on-a-usb-stick/
0 Response to "Istick Reads Protection and Does Not Work"
Post a Comment